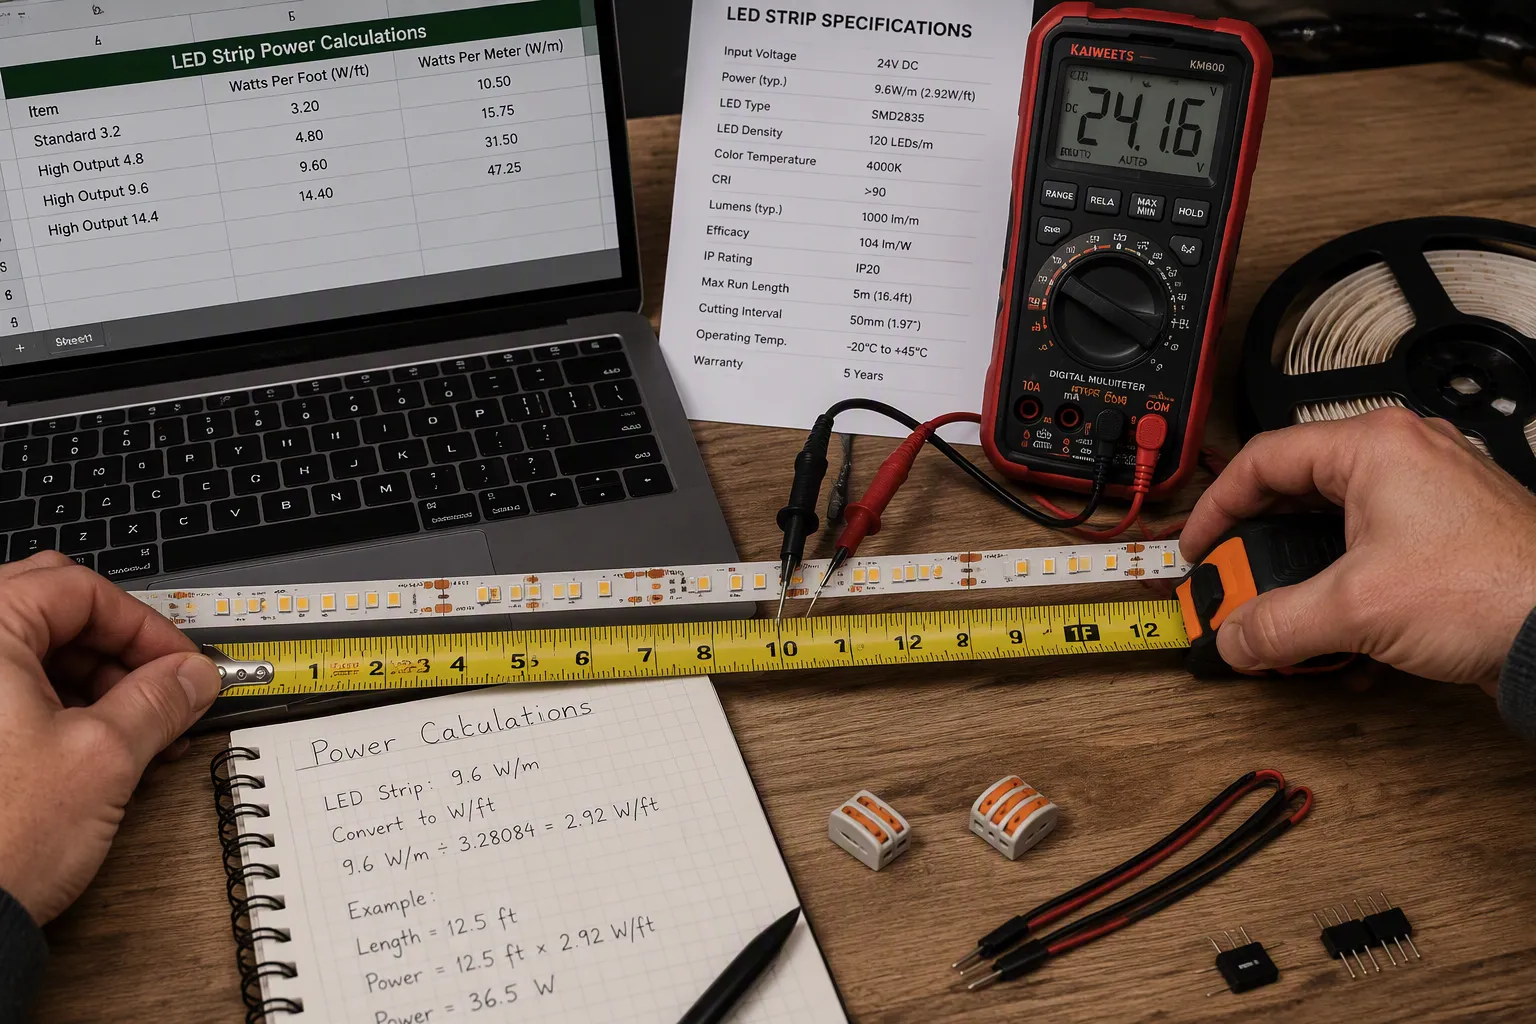
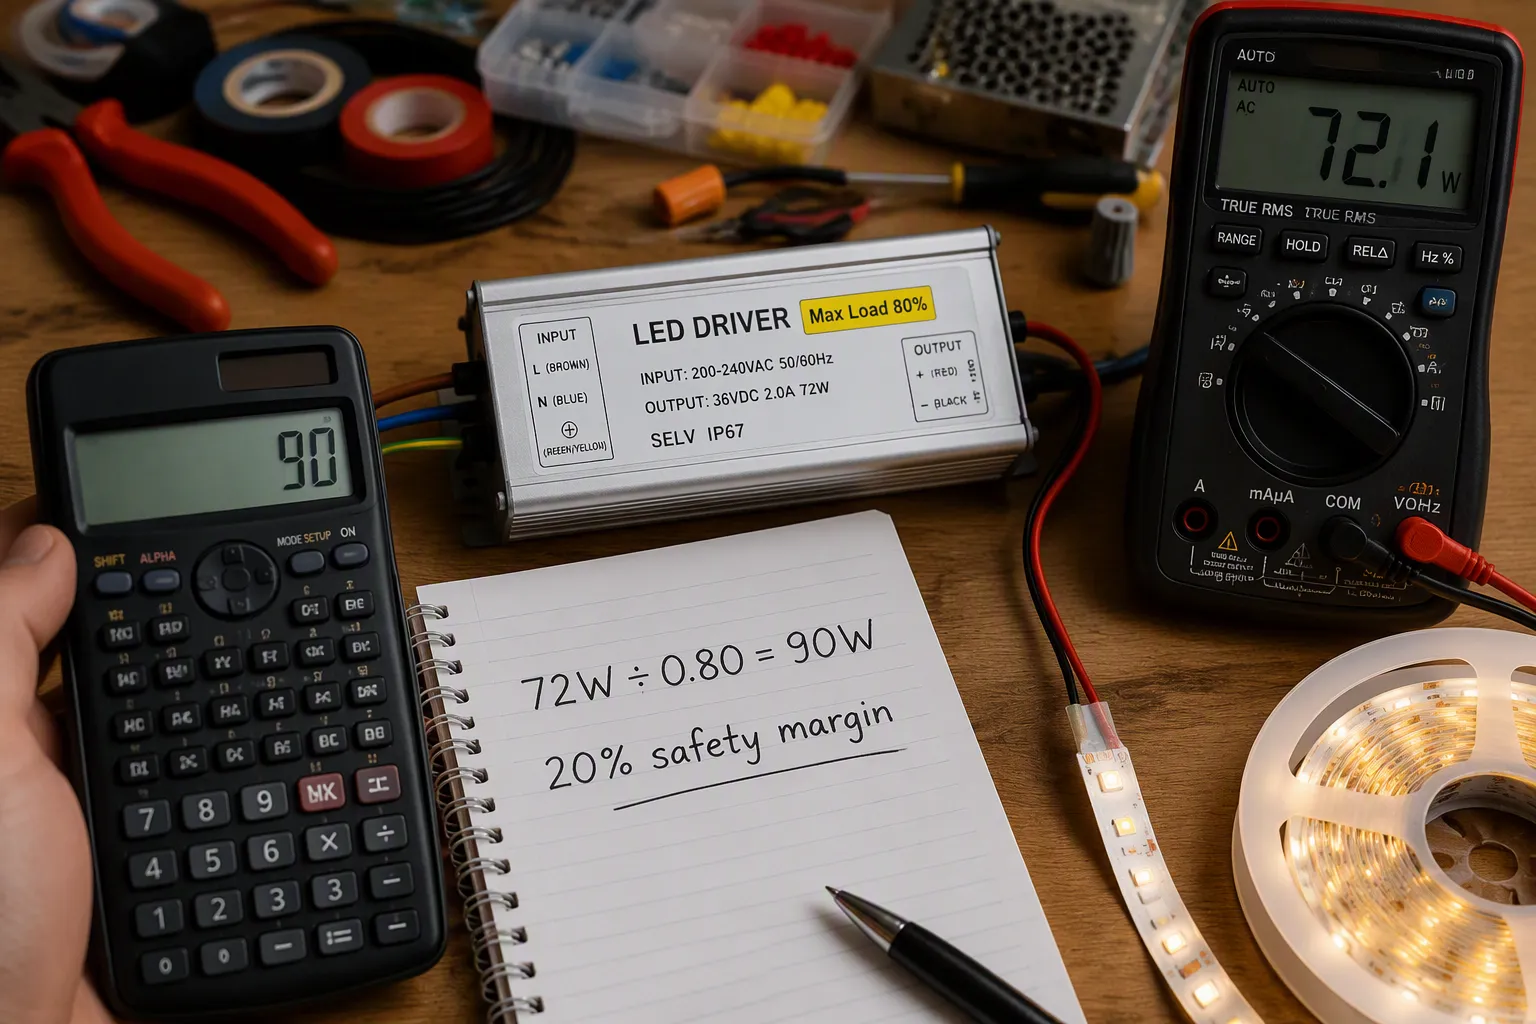
Many DIYers buy a driver based on a guess. This mistake leads to flickering lights or burnt-out units. You can avoid this problem with simple math. The Golden Formula for LED power is: Total Load = Wattage per Foot × Total Length. This calculation gives you the real power demand of your strip. Your goal is to find the sweet spot for driver capacity. Add a 20% safety margin to your total load. This extra room handles heat and inrush current. You will learn to read spec sheets and manage voltage drop in long runs. These steps help you calculate led driver wattage with confidence.
Table of Contents
Toggle
Key Takeaways
Multiply LED strip length by wattage per foot to find total load.
Add a 20% safety margin to your total load for a reliable driver.
Round up to the next standard driver size for extra safety.
Use a 30% margin for enclosed spaces or long wire runs.
Check that your driver voltage matches your LED strip voltage.
Keep drivers cool with good airflow to extend their lifespan.
Measure twice and convert units carefully to avoid mistakes.
LED Load Calculation Basics
Every safe setup begins with the maker's spec sheet. Find the led strip wattage per foot or per meter rating. This number shows how much power one unit of length uses. You can't pick a driver without it.
Finding LED Strip Wattage per Foot
Watts per Foot vs. Watts per Meter
Most North American spec sheets show led strip wattage per foot. European and Asian makers often list watts per meter instead. One meter is about 3.28 feet. A strip rated at 14.4 watts per meter pulls about 4.8 watts per foot. Always change to one unit before you calculate. Mixing units is a common cause of mistakes.
Rated vs. Actual Power Consumption
The rated wattage on a spec sheet assumes perfect conditions. Real-world use can be a bit higher or lower. Voltage changes, strip quality, and room temperature all play a part. Treat the rated number as your starting point. Add your safety margin later to cover this difference.
Measuring Installed Length
Good measurement is the base of correct load calculations. A tape measure works fine for straight runs. A laser distance measurer gives you speed and accuracy across long or tricky spaces. A multimeter checks voltage and continuity after setup. Draw your layout on graph paper or in software before you buy anything. Mark cut points and connector spots on your plan.
Accounting for Connectors and Jumpers
Connectors and jumpers add very little load. Their resistance is tiny compared to the strip itself. You should still count their length in your total. A jumper that spans a gap adds real distance. That distance matters for voltage drop, not for wattage. Keep your count honest and your math stays clean.
Calculating Load for Multiple Zones
Many setups use several strips in different areas. Measure each zone on its own. Add up the lengths of all sections where strips will run. Add a small buffer of 5 to 10 percent for measurement errors or future changes. Think about standard reel lengths, often 5 meters, when you plan your order. Note corners and obstacles that need cutting or extra connectors. Plan cut breaks with care to keep electrical flow.
The Basic Load Formula
Formula: Total Load (W) = Length (ft) × Wattage per Foot (W/ft)
This is the main equation for every project. Multiply your total measured length by the led strip wattage per foot. A 20-foot run of strip rated at 4.8 watts per foot makes a total load of 96 watts. That number shows the real demand on your power supply. Write it down before you shop for a driver.
Converting Amps to Watts (Amps × Volts = Watts)
Some devices list current instead of wattage. You can switch between the two. For DC circuits, the basic formula works right away: dividing wattage by voltage gives current. The wattage stays the same while the current changes with voltage.
AC systems add one wrinkle: power factor. The formula becomes amps = watts divided by (volts times power factor). Power factor shows how well a load turns electrical power into useful work. LED lighting usually has a power factor of 0.90 to 0.95. A load with a low power factor pulls more current than its wattage alone suggests. Always check the spec sheet for the power factor rating.
Good load calculations depend on exact measurements and correct unit changes. Measure twice, convert once, and write every number down. Your driver choice depends on the total load figure you make here.
How to Calculate LED Driver Wattage with Safety Margin
A safety margin keeps your equipment safe from surprises. It stops overheating, handles inrush current, and makes your driver last longer. You need this buffer to calculate led driver wattage the right way. Without it, your led power supply runs at its limit and breaks down early.
The 20% Safety Margin Rule
Risks of Running at 100% Capacity
Running a driver at full capacity causes real problems. The unit makes too much heat. This heat wears down the parts inside over time. A driver at 100% load is less efficient and wastes energy as heat. It also becomes less stable and does not last as long. There is no universal 80% loading requirement for all LED drivers. The appropriate operating load depends on the driver’s specifications, thermal conditions, installation environment, and application. Always follow the manufacturer’s rated load and derating requirements.A driver near 100% capacity runs hot and may trip its thermal protection. This is not safe for any setup.
Heat and Inrush Current
Inrush current is a short burst of power when you first turn on the lights. One 220W LED driver pulls 1 A steady but can make 100 A inrush for 1 ms. When eight of these drivers run together, the branch circuit sees 800 A inrush in the first millisecond. This surge puts stress on the driver and any protection devices. A safety margin of at least 20% helps your system handle these spikes. You should multiply the calculated inrush current by 0.8 to find the maximum safe value. This step protects your equipment from the first power surge.
The Driver Capacity Formula
Formula: Required Driver Wattage = Total Load ÷ 0.80
This formula gives you the smallest driver capacity you need. Divide your total load by 0.80. The answer shows the wattage your led power supply must have. For example, if an LED strip needs 72 watts, the driver should be rated for at least 86.4 watts (72W × 1.2). This extra capacity keeps things running steady.
Alternative: Total Load × 1.2
You can also multiply your total load by 1.2. This way gives the same answer as dividing by 0.80. For a 15-meter strip with 14.4W/m power, the total power is 216W. After adding a 20% margin, the power supply you need is 259.2W. Both formulas work just as well. Pick the one that is easier for you to remember.
When to Use a Larger Margin
Enclosed Spaces and High Heat
Enclosed spaces trap heat around the driver. This heat cannot get out easily. The driver gets hotter than it would in open air. You should use a larger margin in these cases. High surrounding temperatures also need more headroom. A driver in a hot place needs extra capacity to avoid heat problems. The 80% rule is the most common standard for commercial and residential drivers. Premium drivers may allow a 90% load with only a 10% buffer. Still, most setups do better with the standard 20% margin or more.
Long Wire Runs
Long wire runs make voltage drop along the length of the strip. This drop lowers the voltage that reaches the LEDs at the far end. The driver has to work harder to make up for it. A larger margin helps keep the brightness steady. You should also think about the wire gauge for these runs. Thicker wire cuts voltage drop and keeps your system stable. For long runs, a larger margin gives better protection against these losses.
Maximized energy efficiency; minimized thermal losses
Lower heat generation
Longer lifespan
Running your led power supplies at 70% to 80% load keeps them stable and efficient. This habit makes them last longer and cuts maintenance costs. The 80% rule gives you a 20% safety buffer. The 90% rule gives you a 10% safety buffer. Most standard drivers follow the 80% rule. Always check your driver specs before you calculate led driver wattage. A good safety margin protects against overload trips and makes your led driver size choice last longer.
Step-by-Step Worked Examples
These three examples show you how to calculate led driver wattage for common setups. Follow each step with your own numbers.
Example 1: 30 Feet of Standard 5050 Strip
Step 1: Identify Specs (e.g., 4.8W/ft)
Check the spec sheet for your strip. This example uses 4.8 watts per foot. The led strip wattage per foot value drives every later step.
Step 2: Calculate Total Load (30ft × 4.8W = 144W)
Multiply length by wattage. Your total load is 30 feet times 4.8 watts per foot, which equals 144 watts. This figure is your total project wattage.
Divide the load by 0.8. You need a driver rated for at least 180 watts. If the calculated load is 144W, select a driver with sufficient rated capacity for the application, such as a 150W or 200W model, depending on the manufacturer’s load and thermal requirements. Do not assume that a larger driver is always better.
Example 2: 50 Feet of Standard 5050 Strip
Step 1: Identify Specs (e.g., 3.66W/ft)
Standard 5050 strips with 60 LEDs per meter typically draw between 3.66 and 4.57 watts per foot. This example uses 3.66 watts per foot as a conservative figure.
Step 2: Calculate Total Load (50ft × 3.66W = 183W)
Your load equals 50 feet times 3.66 watts per foot, giving 183 watts. Write this number down before you shop.
Divide 183 watts by 0.8. The result is 228.75 watts. Choose a 240-watt driver. This driver capacity covers the load with room to spare.
Example 3: Mixed Load (Strips + Controller)
Adding Receiver and Controller Power Draw
Controllers and receivers draw power too. Idle consumption ranges from 0.156 watts for a C05Z up to 1.03 watts for an An-Penta Plus. Add this draw to your strip load.
LED Controller Model
Idle Power Consumption (W)
C05Z
0.156
LM052
0.18
RGBW2
0.336
Athom
0.444
C05W
0.576
An-Penta Mini
0.672
IDEAL LED
0.744
201P
0.744
WL5
0.78
An-Penta Plus
1.03
Calculating Total System Load
Add the controller draw to your strip load. A 100-watt strip plus a 1.03-watt controller gives 101.03 watts. Divide by 0.8 for a driver capacity of 126.3 watts. Round up to 150 watts. Accurate load calculations protect every part of your system.
Advanced Considerations for Complex Setups
Voltage Drop and Maximum Run Length
Why 24V Systems Handle Distance Better Than 12V
When you run LED strips over long distances, the voltage gets lower along the strip. This makes the lights dim at the far end. A 24V system works better for long distances than a 12V system. For the same power, a 24V LED strip uses about half the current of a 12V strip. Less current means less power lost as heat in the wires. A 24V strip can go about twice as far before you see dimming.
Calculating Voltage Drop for Long Runs
How much voltage drops depends on how much current flows and the wire's resistance. You need to think about voltage drop for any run longer than 10 meters. Manufacturer guidelines should be followed for maximum run lengths and power injection intervals.
Higher voltage means less voltage drop. 12V LED strips lose voltage faster than 24V strips. So for runs over 10 meters, use 24V strips.
Current Calculation and Controller Limits
Converting Watts to Amps (Watts ÷ Volts = Amps)
To find current, divide watts by volts. Always pick an LED power supply that can handle at least 20% more than your calculated amps.
Checking Controller Channel Limits
Most controllers can only handle a certain number of amps per channel. If your load is too high, you need a signal amplifier or more than one controller. Check controller specifications for maximum current per channel and use appropriate fusing as recommended by the manufacturer.
Single vs. Multiple LED Power Supplies
Pros and Cons of Centralized Power
One big LED power supply saves space and makes wiring easier. But if the driver runs at very low load, it wastes energy. Oversizing is safe but may not work as efficiently at low loads. A central driver also means if it fails, everything stops.
When to Use Distributed Power
Distributed power uses several smaller LED power supplies. This makes the system more efficient and lowers voltage drop. You can put each driver close to its load. For big systems, think about fusing on the DC side and using the right wire size. How many drivers you need depends on your total load and how far the strips run. Always make sure the voltage of the LED strip matches the power supply exactly. Pick a good constant-voltage LED supply that has short-circuit, overload, and over-voltage protection. This way you get the best energy efficiency and driver capacity.
Heat Management and Installation Best Practices
Thermal Derating for Enclosed Spaces
Why Drivers in Cabinets Need More Headroom
Heat hurts every LED power supply. During normal use, a driver changes some power into heat. In open air, heat goes away and the unit stays cool. But inside a cabinet, heat gets trapped. The temperature around the driver goes up. The unit gets hotter than it should be. For enclosed installations or high ambient temperatures, follow the driver manufacturer’s thermal derating curve. The required driver rating should be determined based on the actual operating temperature rather than simply adding a fixed percentage to the load.A larger margin keeps the driver safe in a closed box.
The derating rule is easy to use. For higher ambient temperatures, reduce the usable capacity of the driver. Pick your LED power supply based on the real temperature inside the cabinet, not the room temperature outside.
Recommended Clearances for Airflow
Airflow keeps a driver cool. Leave space around all sides of the unit. Mount the driver so air can flow past its body freely. Do not stuff insulation or other items against the case. A driver with blocked airflow gets hot and loses efficiency. Look at the spec sheet for the maker's clearance numbers. If you cannot meet them, add more margin to the load calculation. Good airflow also stops dust from building up on the driver over time.
Wire Gauge and Connection Safety
Selecting the Correct Wire Gauge (AWG) for Amperage
Wire gauge must match the current your system uses. Thicker wire has a lower AWG number and can handle more amps. Thin wire with a heavy load gets hot and loses voltage. That voltage loss makes your LED strips dimmer and wastes power. Always choose wire for the full load current plus your safety buffer. Short runs can use thinner wire than long runs at the same amperage. When not sure, pick the thicker wire. The extra cost is small compared to the risk of overheating.
Securing Connections to Prevent Voltage Drops
Loose connections cause real problems. A weak joint adds resistance, and resistance makes heat. That heat can melt insulation or cause a fire. Loose wires also drop voltage, so your lights dim or flicker. Use the right connectors and tighten every terminal screw firmly. Pull each wire gently to check it is tight. Check connections after the first few hours of use. Recheck them during regular maintenance. Good connections protect your LED power supplies and keep the whole system stable.
Three numbers guide every safe build. Total demand equals length times wattage per foot. The safety margin adds 20 percent. Required driver capacity equals the total divided by 0.8. Round up to the nearest standard size. A 375W result means you buy a 400W driver. Never round down. This load figure protects your driver.
Run this led strip project load checklist before you buy:
Check the spec sheet for wattage per foot.
Measure your total installed length.
Calculate the total demand.
Add 20 percent for safety.
Confirm the voltage matches your led power supply.
Accurate load calculation, appropriate driver selection, proper thermal management, and correct installation all contribute to reliable LED system performance.
FAQ
How do I find the wattage rating for my LED strip?
Check the manufacturer's spec sheet for the watts per foot or per meter value. This number tells you how much power one unit of length uses. You cannot size a driver without it.
What happens if I skip the safety margin?
Your driver runs at full capacity and makes too much heat. This heat wears down the parts inside and shortens its life. A driver near 100% load may trip its thermal protection.
Can I use a bigger driver than my calculation shows?
Yes. Rounding up to the next standard size is always safer. A larger driver runs cooler and handles inrush current better. Just avoid extreme oversizing, which lowers efficiency at very low loads.
How do I add a controller to my load math?
Add the controller's idle draw to your strip load first. Idle consumption ranges from 0.156 watts to 1.03 watts depending on the model. Then divide the total by 0.8 for your required driver capacity.
Why do long runs need more headroom?
Long wire runs cause voltage drop along the strip. The far end gets less voltage and dims. A larger margin helps the driver compensate. A 24V system handles distance better than a 12V system.
How do I convert amps to watts for my setup?
Multiply amps by volts. For example, dividing wattage by voltage gives the current draw. Wattage stays the same while current changes with voltage.
Should I buy one large LED power supply or several small ones?
One large unit saves space and simplifies wiring. Several smaller LED power supplies lower voltage drop and improve efficiency. For larger systems, distributed power with proper fusing works well.